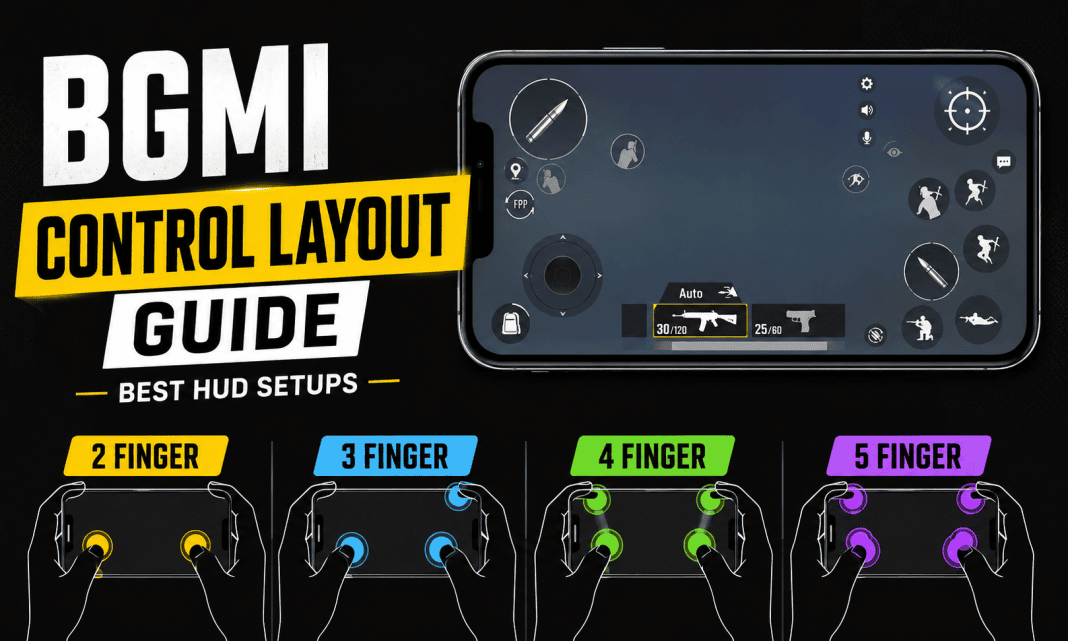
BGMI Control Layout can make a major difference in how quickly you move, aim, shoot and react during fights. While 2-finger controls are simple and comfortable for beginners, 3-finger, 4-finger and 5-finger claw setups give players more freedom to perform multiple actions at once. The best HUD depends on your device, hand size and playstyle. In this guide, we explain the best BGMI control layout for each finger setup, where to place important buttons, and how to transition to a more advanced claw setup without hurting your gameplay.
BGMI Control Layout: Which Finger Setup Is Best?
There is no single BGMI control layout that works for every player. Your ideal setup should let you move, aim, fire, scope and use movement buttons without forcing your fingers away from their primary positions.
| Setup | Fingers Used | Best For | Difficulty |
|---|---|---|---|
| 2-Finger | Both thumbs | Beginners and casual players | Easy |
| 3-Finger | 2 thumbs + 1 index | Players moving into claw | Medium |
| 4-Finger | 2 thumbs + 2 index fingers | Competitive and aggressive players | Hard |
| 5-Finger | 2 thumbs + 2 index + 1 extra finger | Advanced players | Very Hard |
A 2-finger HUD is the easiest starting point because both thumbs handle almost everything. A 3-finger setup adds an index finger for shooting, while 4-finger claw separates shooting and scoping from movement and camera control. The 5-finger setup goes one step further by assigning another important action to an additional finger.
The key is not to copy a professional player’s layout exactly. Screen size, hand position and personal comfort can change how effective a HUD feels. Even community discussions around 4-finger and 5-finger layouts show that players often make small changes based on their device and grip.
Best 2-Finger BGMI Control Layout
The 2-finger setup uses the left thumb for movement and the right thumb for aiming and most other actions. It is the most comfortable BGMI control layout for new players because it does not require learning a claw grip.
Recommended 2-Finger HUD
- Left thumb: Movement joystick
- Right thumb: Camera and aiming
- Right-side fire button: Near the right thumb
- Scope: Above or near the right thumb
- Crouch: Right side, below the scope
- Jump: Above crouch
- Prone: Close to crouch
- Peek: Around the upper-right area
Keep the most frequently used buttons close to the right thumb. Avoid placing too many buttons around the joystick because accidental taps can interfere with movement.
The main disadvantage is that one thumb often has to perform several jobs. Shooting, aiming, jumping and crouching at the same time can become difficult. However, for casual matches and beginners, the simple layout can still work very well.
Best 3-Finger BGMI Control Layout
The 3-finger claw is a good upgrade for players who have outgrown the 2-finger setup. The usual arrangement keeps the left thumb on movement, right thumb on aiming, and uses the left index finger for firing.
This gives you an important advantage: you can move and shoot at the same time without forcing your movement thumb to leave the joystick.
Recommended 3-Finger HUD
- Left thumb: Movement
- Left index: Fire
- Right thumb: Aim, scope and movement actions
- Top-left: Fire button
- Right side: Scope, crouch and jump
- Upper-right: Peek buttons
Move the left fire button toward the upper-left corner so your index finger can reach it naturally. Keep the joystick in its normal position and leave enough empty space around it for smooth movement.
The 3-finger setup is particularly useful for close-range fights because you can strafe while firing. It is also a relatively easy transition for players coming from 2-finger controls.
Best 4-Finger BGMI Control Layout
The 4-finger claw is one of the most popular advanced BGMI control layouts because it separates the main combat actions between 4 fingers.
A common setup uses the left thumb for movement, left index for firing, right thumb for aiming and right index for scoping or other upper-screen actions.
Recommended 4-Finger HUD
- Left thumb: Movement joystick
- Left index: Fire
- Right thumb: Camera and aim
- Right index: Scope and peek
- Top-left: Fire button
- Top-right: Scope/peek buttons
- Right side: Jump and crouch
- Lower-right: Camera controls
The biggest advantage is that your thumbs remain dedicated to movement and camera control while your index fingers handle important combat buttons.
This makes actions such as moving + aiming + firing + scoping much easier to perform together. That is why 4-finger claw is widely associated with competitive BGMI gameplay.
However, do not expect immediate improvement after switching. Your muscle memory needs time to adapt. Start in Training Mode and TDM instead of immediately using the new HUD in ranked matches.
Best 5-Finger BGMI Control Layout
The 5-finger setup is designed for players who want to separate even more actions. It can provide excellent control during aggressive fights, but it has the steepest learning curve.
A practical 5-finger BGMI control layout can use:
- Left thumb: Movement
- Left index: Fire
- Right thumb: Camera and aim
- Right index: Scope and peek
- Extra finger: Jump, crouch, prone or another frequently used action
The exact fifth-finger assignment depends heavily on your device and grip. Some advanced players use the extra finger for movement actions, while others dedicate it to another combat button.
Community examples show that 5-finger players use different combinations, including full-gyro and non-gyro layouts. This highlights an important point: there is no universally correct 5-finger HUD.
How To Build the Best BGMI Control Layout
Instead of copying a random HUD, build your BGMI control layout around your natural hand position.
First, hold your phone exactly as you normally do while playing. Then place the joystick under your left thumb and the camera area under your right thumb.
Next, position the fire and scope buttons where your index fingers can reach them without stretching. Keep jump, crouch and prone close enough to access quickly but far enough apart to avoid accidental taps.
Button size also matters. Frequently used buttons should be easy to hit, while less important controls can be smaller and placed toward the edges.
A copied control code can be a useful starting point, but it should not be treated as a perfect final setup. Even guides discussing BGMI control codes recommend adjusting imported layouts around your own grip and screen size.
Best BGMI HUD Setup for Different Players
Beginners: Start with 2-finger controls. Focus on movement, aim and basic combat before learning claw.
Players switching from 2-finger: Try 3-finger claw first. Adding a dedicated fire finger makes the transition easier.
Rank push players: A 4-finger setup offers a strong balance between speed and control once you build muscle memory.
Competitive players: 4-finger is a strong all-round choice, while 5-finger can work for players who are comfortable with more complex controls.
Tablet players: You have more screen space, so you can spread buttons farther apart and make index-finger controls easier to reach.
Tips To Improve Your BGMI Control Layout
- Keep the joystick area clean.
- Place fire and scope buttons where your index fingers naturally rest.
- Avoid putting important buttons too close together.
- Use a larger button for actions you frequently miss.
- Test your HUD in Training Mode before ranked matches.
- Practice the new layout in TDM.
- Change one or two buttons at a time instead of rebuilding everything repeatedly.
- Give your muscle memory enough time to adapt.
- Adjust the layout according to your device and hand size.
Most importantly, do not change your HUD every few days. A slightly imperfect layout that you have mastered is usually more useful than a theoretically perfect setup that you have not practiced.
The best BGMI control layout depends on your experience and comfort. 2-finger controls are ideal for beginners, while 3-finger claw provides an easy step toward faster combat. 4-finger claw offers the best balance for players who want competitive-level control, while 5-finger claw is better suited to advanced players who are comfortable with a more complicated HUD.
If you are currently using 2 fingers, move to 3 fingers first rather than immediately copying a 5-finger setup. Once the new controls feel natural, you can add more actions and build a HUD around your own playstyle.
FAQs
Which BGMI control layout is best for beginners?
The 2-finger layout is the easiest for beginners because it uses both thumbs and requires very little adjustment.
Is 4-finger better than 3-finger in BGMI?
A 4-finger setup can provide more simultaneous control, especially during aggressive fights, but it is harder to learn. A comfortable 3-finger HUD can still be highly effective.
Is 5-finger claw worth using in BGMI?
It can be useful for advanced players who want to separate more actions, but it requires significant practice. It is not automatically better than 4-finger claw.
Should I copy a pro player’s BGMI HUD?
You can use a pro HUD as a starting point, but adjust button positions and sizes according to your device, hand size and comfort.
How long does it take to learn a new BGMI HUD?
The time varies from player to player. Start with Training Mode and TDM, and avoid changing the layout repeatedly while your muscle memory is developing.