


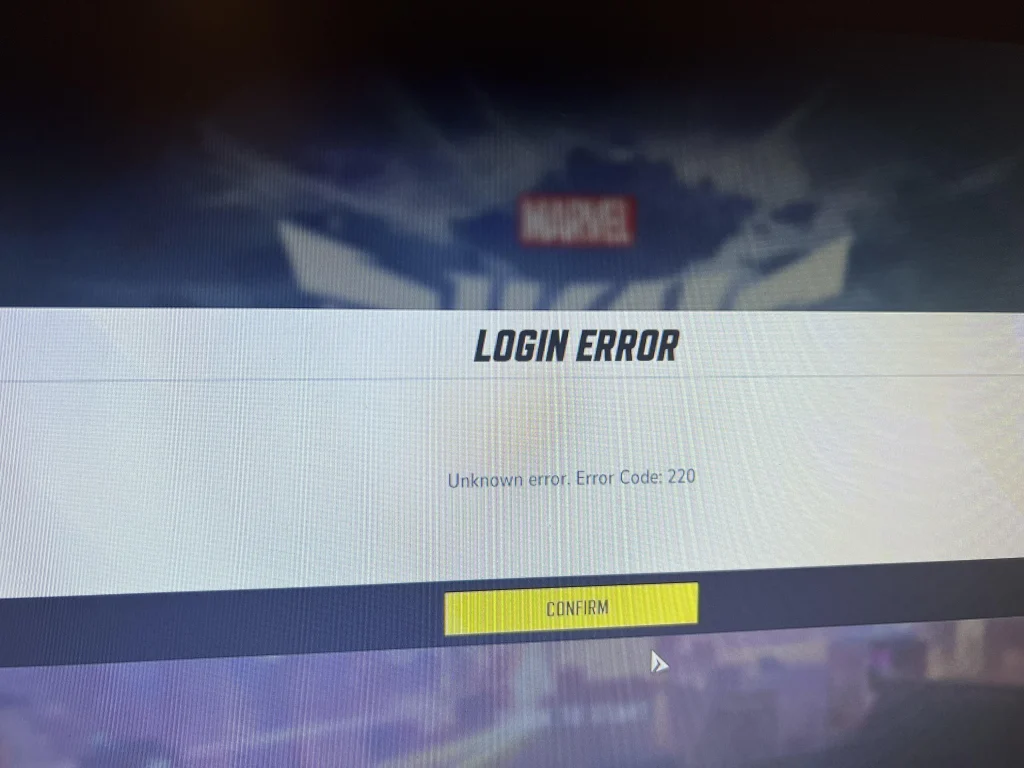
The infamous Marvel Rivals error code 220 is one of the most annoying issues that you can face when trying to play the NetEase hero shooter. Not only does this error prevent you from queuing for a multiplayer game, but it renders you completely unable to access the game.
If you’ve been facing the Marvel Rivals error code 220 when trying to log into the title, you’ve come to the right place.
In this guide, we’ll walk you through everything you need to know to fix the error code 220 in Marvel Rivals, including what causes it and potential solutions that you can try right away to get back into the game.
Without further ado, let’s check out some fixes for Marvel Rivals error code 220.
Marvel Rivals Error Code 220 Fix
The Marvel Rivals error code 220 is primarily caused by issues with your internet connection, DNS settings, or your Windows Firewall blocking access to the game servers.
Here are some solutions that you should try to fix error code 220 in Marvel Rivals:
- Relaunch Marvel Rivals & Steam: The first thing you should try upon encountering this error is to relaunch your game. If you’re playing via Steam, you should completely exit Steam before launching it again.
- Restart Your Router: In many cases, a simple router restart is enough to fix the Marvel Rivals error code 220. After turning your router off, be sure to wait at least 30 seconds before turning it back on.
- Check Your Virus Protection Settings: Hit the Windows key on your keyboard, and type in ‘Virus and Threat Protection.’ Now, head to ‘Manage Ransomware Protection’ and double-check to see if you have any Marvel Rivals folders as a protected folder.
- Use a VPN: In case there’s a problem with your ISP, using a VPN is usually a swift way of fixing the Marvel Rivals error code 220.
- Windows Firewall Settings: Hit the Windows key once again and type in ‘Allow an app through Windows Firewall.’ Now, click on ‘Change settings’ and find Marvel Rivals from the list. If you’re unable to find the game, you can select ‘Allow another app’ and manually locate the EXE file. Check the ‘Private’ and ‘Public’ boxes and hit ‘OK’ to save your changes.
- DNS Settings: Changing your DNS settings can also fix the error code 220 in Marvel Rivals. To change your DNS, press the Windows key on your keyboard and type in ‘Command Prompt.’ Right-click it and run it as an administrator. Now, type in the following and hit enter after each line:
- netsh
- interface show interface
- (Take note of the “Interface Name” column to find the name of your active network adapter)
- interface ip set dns name=“adapter-name” source=“static” address=“X.X.X.X”
- (Change “adapter-name” to the name of the adapter from the last step, and the “X.X.X.X” to your desired primary DNS IP address)
Once you’ve followed these steps, launch Marvel Rivals, and the error code 220 should be resolved.
In case the problem persists, there might be an issue with the game servers, in which case your best bet would be to wait it out.