")
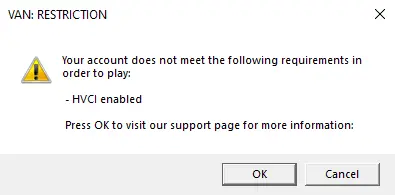
The “HVCI enabled” issue in Valorant has been a major roadblock for players after Riot Games updated its Vanguard anti-cheat system last year. The error usually presents itself as a “VAN: RESTRICTION” message informing you that your account does not pass the requirements to play, citing that HVCI must be enabled.
In this article, we will explain what HVCI is and how to enable it correctly. Without wasting further time, let’s dig into it.
What is HVCI Enabled Error?
HVCI is an abbreviation for Hypervisor-Protected Code Integrity, otherwise called Memory Integrity. This Windows security component builds a separate virtual environment that will not allow malicious software to interfere with your computer’s kernel. In essence, it is like an impenetrable security wall that makes it extremely difficult for cheaters to inject harmful code or employ sophisticated hacks that run at the kernel level.
Riot Games instituted this requirement following a summer 2024 Vanguard update to make their anti-cheat mechanism stronger. As GamingDoc, the developer of Vanguard, attested on July 10, 2024, the move was aimed at enhancing security against advanced cheating techniques. The requirement ensures that Valorant executes in an environment that is secure and where kernel-level cheats will not be able to circumvent the anti-cheat mechanism with ease.
How to Fix HVCI Enabled Error in Valorant?
The most straightforward fix involves enabling Memory Integrity through Windows Security settings. This solution works for most players experiencing the HVCI error, particularly those using Windows 10, where the feature isn’t enabled by default.
First, open Settings for Windows by clicking the Start button and choosing the Settings (cog) icon. Go to “Update & Security” and then click on “Windows Security.” Under the Protection areas section, choose “Device Security.” Find “Core Isolation” and click on “Core Isolation Details.” Lastly, flip the “Memory Integrity” switch to “On” and shut down your computer.
For Windows 11 users, the route is a little different: go to Settings > Privacy & Security > Windows Security > Device Security > Core Isolation Details and turn on Memory Integrity.
If the initial solution fails, some advanced diagnostic procedures can solve more in-depth instances of the HVCI error. Let’s check them out one by one.
BIOS Virtualization Settings
If Memory Integrity doesn’t show up as an option in Windows Security, the problem is usually with virtualization being turned off in your system BIOS. You’ll have to reboot your computer and access the BIOS setup using keys such as F2, F10, F12, or Delete while booting up. Search for “Virtualization Technology,” “Intel VT-x,” or “AMD-V” within your BIOS settings and turn it on. The location changes with the manufacturer, so refer to your motherboard manual for details.
Driver Compatibility Issues
Incompatible drivers, especially older Logitech drivers and software, often cause HVCI from successfully enabling. When you try to enable Memory Integrity, Windows will show a list of incompatible drivers in case there are any. Remove offending drivers via Device Manager by opening up categories such as “Human Interface Devices,” “Keyboards,” and “Mice and other pointing devices,” right-clicking on Logitech-related devices, and then choosing “Uninstall device.”
Group Policy Editor Configuration
For users of Windows Pro and Enterprise, turning on Virtualization Based Security via the Group Policy Editor can help fix chronic problems. Press Windows + R, enter “gpedit.msc,” and go to Computer Configuration > Administrative Templates > System > Device Guard. Double-click on “Turn On Virtualization Based Security,” choose “Enabled,” click “Apply,” and reboot.
Vanguard Reinstallation
At times, corrupted Vanguard files result in the HVCI error. Reinstalling Vanguard solves this. To do so, open the Riot Games Client, locate the Vanguard icon from the system tray, right-click it, and choose “More > Uninstall Vanguard.” Restart your computer and then reopen the Riot client. Vanguard will reinstall automatically.
Registry Editor Method
As a last resort, HVCI can be enabled by advanced users using the Windows Registry Editor. Press Windows + R, enter “regedit,” and go to “HKEY_LOCAL_MACHINE\SYSTEM\CurrentControlSet\Control\DeviceGuard\Scenarios\HypervisorEnforcedCodeIntegrity.” Set the “Enabled” value to 1, then reboot your computer. Be careful with registry edits since improper changes can lead to system instability.
Verdict
To avoid future HVCI-related issues, maintain updated system drivers, particularly graphics and motherboard drivers. Avoid installing third-party software that might conflict with Windows security features, and keep your Windows installation current with the latest updates.
Game users with Logitech gaming peripherals need to be especially careful to keep their drivers up to date, as older Logitech drivers are often not compatible with Memory Integrity. Try updating to the current Logitech G HUB software or removing older Logitech Gaming Software to avoid interference.
